Friday, January 28, 2011

An Inside Scoop

After all the buzz about The Craft Spot, I thought you might like to see what we're talking about! Here are some pics taken right before our open house.


Our logo, designed by Michelle James. This is on the pillar just outside The Craft Spot so you can see it from the rest of the store!


This is taken from the very back of The Craft Spot so you can see all of our tables set up, just waiting for people to come work at them.


I'm standing in front of the curtains from the previous picture, taking a picture of one side of the space, and a teensy bit at the back.


One of the work stations. Look at my super-cute chair I refinished! Kathy Jackson did the upholstering, I did the sanding and painting. They're so shabby-chic!


A display of products offered at another local store, Hughes Pharmacy. We are trying to get the word out so we can support local stores.

If you are local, or nearby, stop in to see it. We would love to keep the memberships coming!

Wednesday, January 26, 2011

The Craft Spot


Anticipation is part of the experience, and I've been anticipating the opening of The Craft Spot for about 6 months! Woot!


Michelle James, Kathy Jackson, and I have created this monster. Together we have been plotting, planning, and preparing for this membership based crafting club, located inside Kathy's existing clothing store, K. Jackson & Co. Here are the details:

*Membership is for any crafter, age 18 and older. We welcome quilters, model makers, cardmakers, knitters, scrapbookers and more.
*Cost is $10/month with a 3 month minimum commitment.
*Members receive access to the crafting space during K. Jackson & Co.'s normal store hours, as well as one late night per month. (That's all 7 days a week!)
*A limited amount of storage space is available for members to leave their supplies, so no need to transport everything each time you go.
*Classes will be offered for an additional fee, and non-members are invited to take classes as well!
*A limited amount of papercrafting supplies will be for sale at The Craft Spot.

Tonight, Wednesday January 26th at 6:30 pm, we are hosting an open house to give you all the details, answer questions, and get you registered! I hope to see many of you there.

I'm SO EXCITED!! :D

Monday, January 24, 2011

Lining An Envelope

Have you ever lined an envelope? It is really, really easy to do, and it adds such a pop of style to your handmade cards.

To line an envelope, pick a piece of patterned paper or cardstock that will coordinate with your card. Measure the outside of the envelope, both width and height, measuring up to the adhesive strip. Cut your cardstock somewhere between 1/16th and 1/8th of an inch less than both of those measurements.


For example, my A2 envelope was 5 3/4 x 6 1/8, so I cut the cardstock to 5 11/16 x 6 inches. Slide the paper or cardstock into the envelope, keeping the printed side showing. From here, you can either turn the envelope over, trim the excess off the cardstock along the angle of the envelope, or you can trace the angle, remove the cardstock, cut it, and slide it back in.

Fold the paper or cardstock at the top of the envelope and crease. Add adhesive to the sides and top of the paper, and stick it to the envelope.


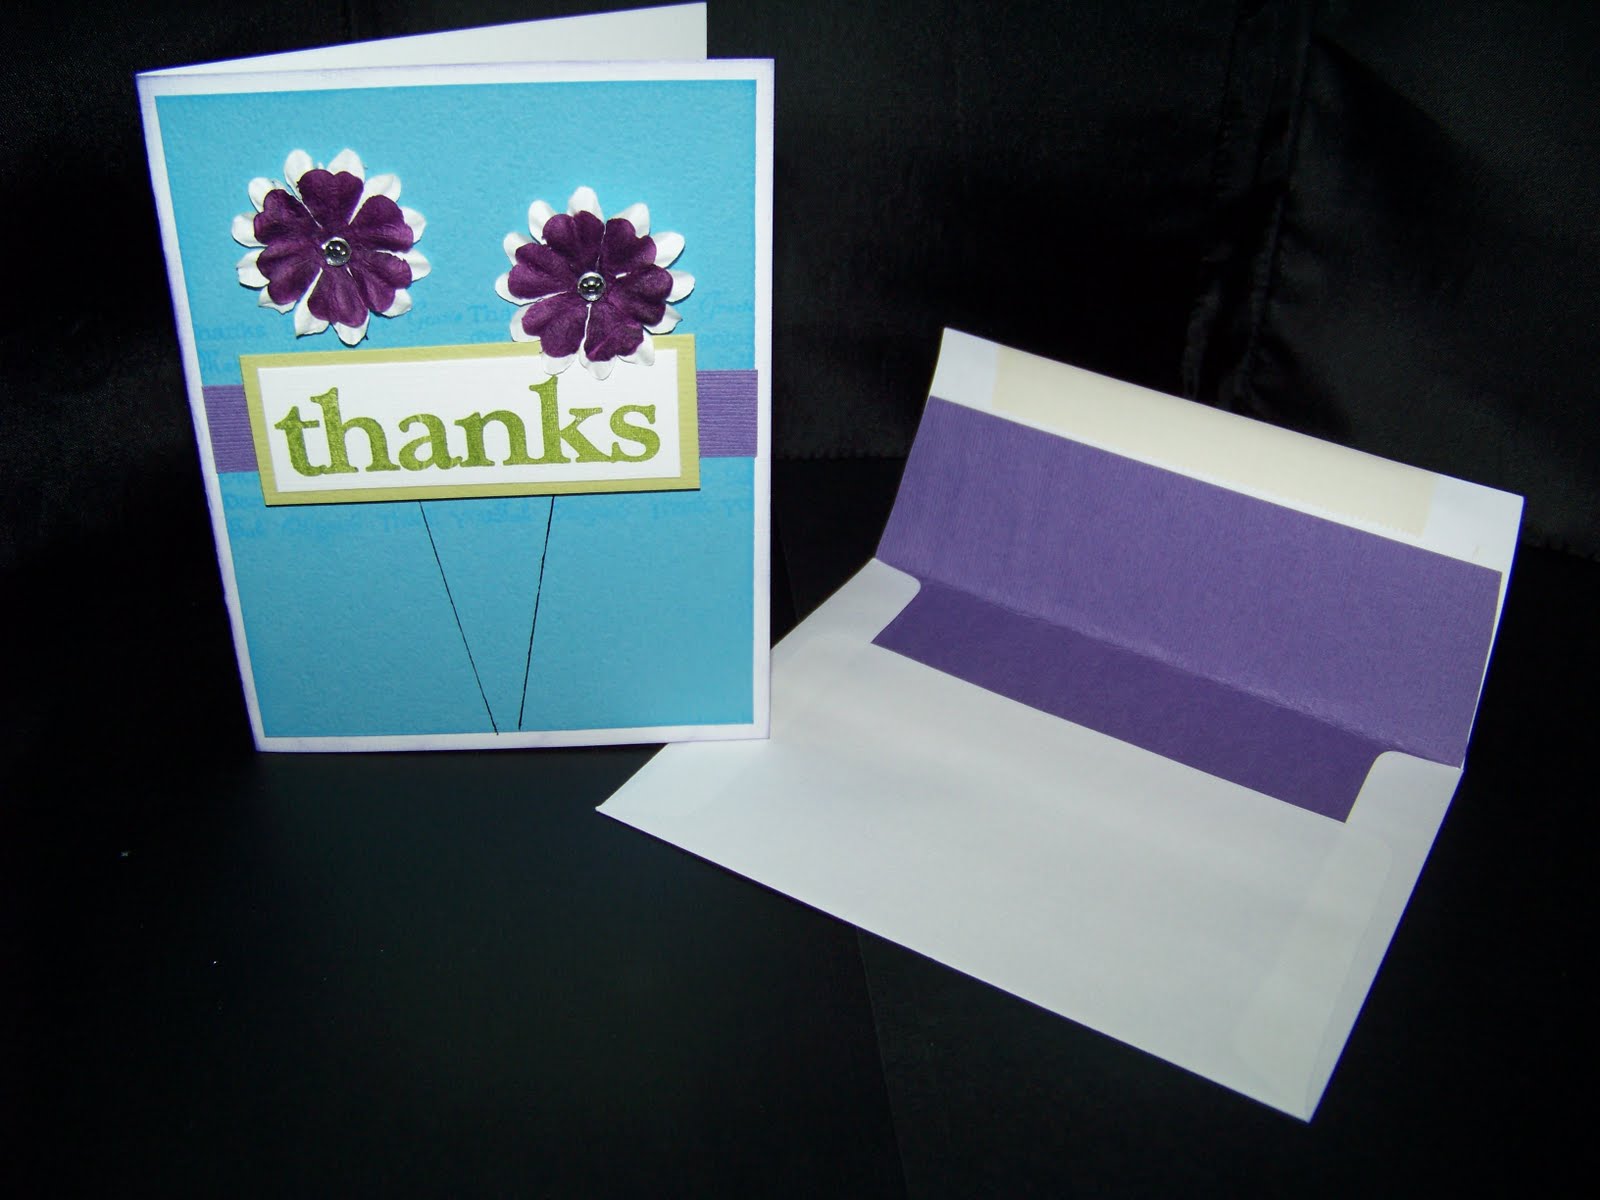
The results are fantastic! Look how cute!


This pink card and envelope were probably based on something I saw a while ago, but just don't remember. (I want to give props where deserved...) Anyway, the color scheme is certainly my style, isn't it?


This card I know where I scraplifted it from: Technique Tuesday's idea book. They did theirs with different colors and the flowers were stamped images, but the concept and layout are the same. I'll save this card for someone who really, really deserves a big thanks! :)

What other cute ideas have you always wondered how to do?

Wednesday, January 19, 2011

New Releases!

OK, I've been slacking...you all need to get on my case if I don't keep up on posts!

Anyway...

Happy to share with you new releases from Scribble Scrabble. Scribble Scrabble is a paper company with a very boutique-y style. Their two newest paper lines are Naomi's Collection and Jubilee. I couldn't figure out how to copy and paste the pics from their website, so I'm just giving you the link to click:

http://www.scribblescrabble.net/sneakpeek.html

Let me know what you think!

Friday, January 14, 2011

Organize and label. And label, and label and label!

I'm obsessed with labeling. My label maker is probably the most used tool in my scraproom, and it has even ventured out to other parts of the house which absolutely drives my husband nuts! I just love how easy it is to label a container so every time I need something, I mostly know where to look.

The organization of scrap supplies is NOT one size fits all. You have to find what works for you, usually through trial and quite a bit of error, then make a plan and stick to it. Make sure it's something you can keep up on and follow its logic.

As for me, I organized all my patterned paper by manufacturer:


and my cardstock by color: (using ROY G. BIV) If you're unfamiliar with Roy, you obviously didn't have Mrs. Leonard for elementary art. :)
R- red
O- orange
Y- yellow

G- green

B- blue
I- indigo
V- violet

After V, I go to pink, tans, browns, blacks, and whites.


I have ribbon sorted by colors as well:


then a separate tub for flowers:


one for blingy thingies, rubons, letter and number stickers, and finally, one labeled "random embellishments" for things I just didn't know what to do with! (This one is currently overflowing, so it's time to shift a few things around...)


How do you organize your space? Do you use a label maker? What's your key to sorting and keeping things in their place?

Thursday, January 13, 2011

A technique using Technique Tuesday!

There comes a time in every scrapbooker's life where she realizes...she actually doesn't have it all. You know, you're looking for that perfect embellishment, the final doo-dad, the background paper to beat all background papers...and it's simply not there. We might spend a moment cursing our stash, or perhaps the manufacturers for not making something so "obviously" needed, but our time would probably be better spent making what we need! After all, we're crafty, right? Craft it then! For today's project, I did just that. I stamped my own patterned paper. First, a look at the completed layout:

This was a page I did showing two of the cutest people I know (tee-hee!) all dressed up for their friends' son's wedding. I had the perfect shade of turquoise blue cardstock, (Bazzill's Yosemite for those of you wondering...) but all my patterned papers were too busy, too yellowy, too colorful, or just plain wrong! I decided to take out my all-time favorite Technique Tuesday stamp set, Fanfare, and stamp my own patterned paper!

I had four strips, (approx 2x8) that I wanted to make up the background. I used Quick Quotes' Blue Hawaiian ink, which also matched perfectly, and stamped each strip using a different fanfare swirl.

When they were all laid out side by side, they looked fluid, as though they were meant to go together! I thought it was a great way to add a little pattern and a touch of color.

The extra-nice thing about Technique Tuesday's stamps is that they are very well made, and therefore ridiculously easy to get a great stamped image. You'll notice no smudges, shadows, background blotches, or missed images. It's not because I'm a professional grade stamper, it's just that the stamps are that good. If you look at your clear (or rubber) stamps, you can quickly tell if it's quality or not. If the stamp is cut deeply, you have less of a chance of accidentally inking the area around the image you wish to stamp. If the image is cut close to the edge, you are also less likely to get ink where you don't want it.

So, the next time you are lamenting that you don't have what you need, take a look at your stamp collection and see if there isn't something that they could do for you! Don't be afraid to mix stamping with scrapbooking. They make the perfect pair.

Wednesday, January 12, 2011

Final 3 Moxxie releases

Here we go! These are the last of the new releases from Moxxie. You're going to LOVE these!


This line is fabulous for so many reasons! Think boo-boos, braces, tooth fairy, and first pair of eyeglasses...all these events from daily life should be scrapbooked too. The colors and patterns lend themselves well to all photos, so scrap away!


Yay! A family line! These are great for family reunion pages, Mother's Day, Father's Day, Grandparent's Day, birthdays, anniversaries...you name it. I absolutely adore the color scheme and can't wait to get my hands on them!

Hee-hee! How cute is this line?!?! For all my friends with little guys running around, this line will have a million uses. Birthday cards, scrapbook pages, altered projects. (How cute would a crayon box be covered with some of this product?) It's so cute and frightening all at the same time!

I hope you enjoy seeing these. Let your local scrap store know what you're interested in so they know what they need to order.